Many years back I got into making jewelry, anything from beads to polymer clay. In keeping with my holiday spirit and celebrating Valentine's Day (over a month early hehe), I decided to make these super cute polymer clay heart earrings with a touch of pearl. You can watch the video here.
Supplies:
- Polymer clay
- Heart shaped mini metal cutter
- Gesso (unless you have colored polymer clay)
- Acrylic paint (unless you have colored polymer clay)
- Sculpey Gloss Glaze
- Glossy Accents
- Flat back pearls of various sizes
- Stainless steel earring posts
- Hot glue
I should mention, and maybe this will be a tip for others, that the polymer clay I had was from several years back. Needless to say it was kind of dry. I ended up putting the piece of polymer clay I wanted to work with in a ziplock bag, and then I placed that bag into a bowl of hot water and let it sit for about 30 minutes. It softened up the clay enough to work with!
Roll out your clay!
Next I took the heart shaped metal cutter and cut out a couple of hearts. As you can see it was a little off on the lower right side, so I just took my X-acto knife to even it out a bit.
Then I popped these girls in the oven at 275° F for 15 minutes.
Before I painted, I hot glued the stainless steel posts to the hearts.
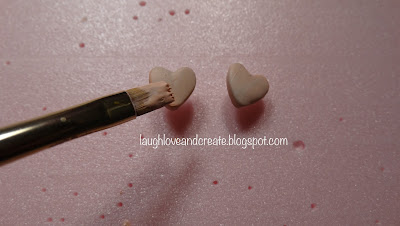
I first applied Gesso as a base, and then 2 layers of paint. Again if you have colored clay, you can skip this part. I'm just too frugal to go out and buy colored clay. hehe.
This is my favorite product, Sculpey gloss glaze. I applied 2 layers of this as well, waiting 30mins between each layer. This glaze is just amazing. It adds a beautiful glaze and it fills in any imperfections.
And I don't know what happened with the lighting, so forgive me, but lastly I applied these flat back pearls. I used Glossy Accents to bond the pearls to the hearts.
And there you have it! Cute heart earrings. You can switch up the colors and the bling.


0 comments:
Post a Comment